 Help Desk +1-778 878-1690

Desk-top Centrifuge system- RHS-110-T41
$0.00
POINTVALUES Desk-top Centrifuge system- RHS-110-T41 machine adopts brushless motor, microcomputer control, RCF automatic calculation and setting. Equipped with multiple program protections, easy operation and maintenance-free.
POINTVALUES Desk-top Centrifuge System — RHS-110-T41
The RHS-110-T41 adopts a brushless motor, microcomputer control, and automatic RCF calculation and setting.
Equipped with multiple program protections, it offers easy operation and is maintenance-free.
II. Main Technical Parameters
| Model | RHS-110-T41 |
|---|---|
| Maximum Speed | 10,000 r/min |
| Maximum Relative Centrifugal Force | 10,290 × g |
| Capacity | 50 ml × 6 |
| Speed Accuracy | ±50 r/min |
| Timing Range | 0–99 hours |
| Power Supply | AC 220 V, 50 Hz, 15 A |
| Machine Noise | ≤ 60 dB |
III. Safety Instructions
- Remember to observe the following safety precautions when using this product, and read all user manuals.
- The electrical rated parameters of the socket provided by the user should not be less than the electrical rated parameters of the machine and must have good grounding measures.
- When replacing the fuse, pull out the plug from the socket.
- After the instrument fails, it should be repaired by professionals. The use of non-original accessories will cause certain quality problems.
- When used in an environment with children, pay close attention to it.
- It is strictly forbidden to open the cover of the centrifuge head when it is running. Wait for the rotor to completely stop rotating before opening the lid and taking out the centrifuge tube.
- It is strictly forbidden to move the instrument during use.
- It is strictly forbidden for various liquids or other debris to enter the centrifuge working chamber; otherwise it will damage the host.
- The instrument should be supervised while it is in use.
- When scrubbing the machine, unplug the power first.
- The housing of the instrument should be properly grounded to avoid accidents caused by moisture.
IV. Instructions
- Place the centrifuge on a firm, level platform; ensure the four machine feet are balanced.Then, shake it gently by hand to check whether the centrifuge is placed stably.
- Open the door, gently place the rotor on the motor shaft, and tighten the nut to connect the rotor and the motor shaft tightly
(be careful and gentle; avoid large left–right shaking and up–down pressure to protect the motor bearings).
After tightening, the rotor should rotate freely when lightly turned by hand. - Put the centrifuge tubes into the rotor apertures. All positions must be populated and the test solution in each tube must be even and consistent to ensure balanced operation.
- Gently close the door cover and verify it is locked (lightly try to open after closing; the door should not open).
- Plug in the power socket and press the power switch.
- Set the rotor number, speed, and time. Each time you press the <select key>, the digits in the rotor, speed, and time windows flash in sequence; the flashing window is the active input.
- Set the rotor number: press the <select key> until the rotor window flashes, then press the <plus> or <minus> key to choose the rotor number for this run.
Special reminder: The rotor number must match the configuration of the rotor used (different rotor numbers have different acceleration curves and maximum speed limits). For the correspondence between rotor number and rotor specifications, see “Matched Rotor” in the [Technical Index]. - Set the speed: press the <select key> until the speed window flashes, then press the <plus> or <minus> key to set the running speed.
Special reminder: The angle rotor equipped with this machine has a specified rotor number and maximum speed limit. Strictly follow the speed limit in the “Equipped Rotor” of the [Technical Index] to ensure safe operation. - Set the time: press the <select key> until the time window flashes, then press the <plus> or <minus> key to set the running time.
- When the above steps are completed, press the <Approval Key> to confirm. Otherwise, after 8 seconds of flashing, the set value will be discarded and revert to the original value.
- Set the rotor number: press the <select key> until the rotor window flashes, then press the <plus> or <minus> key to choose the rotor number for this run.
- After verifying the settings, press the <Start> key to start operation.To view the centrifugal force during operation, press the <speed/centrifugal force> button. The yellow light turns on and the window displays the RCF at the current speed. Press the key again to return to speed display.
- When the running time counts down to “0”, the centrifuge stops automatically. When speed reaches 0, the buzzer sounds; press the <Approve> button to cancel the buzzer.
In an emergency, press the <Stop> button; when the centrifuge stops, the buzzer will not sound. - After confirming the rotor has completely stopped, open the door cover, carefully remove the centrifuge tubes, and complete the entire separation process.
- Turn off the power switch and cut off the power to the centrifuge.
- In the event of a sudden power failure, the electronic door lock can be opened by gently pressing the door cover with one hand and pulling the small handle located on the upper front left side of the instrument with the other hand.
RELATED PRODUCTS

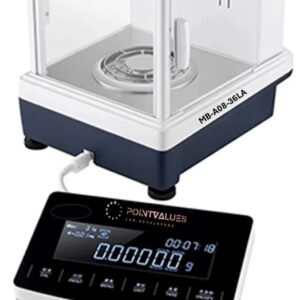
Analytical Balance -Digital Lab Sca...

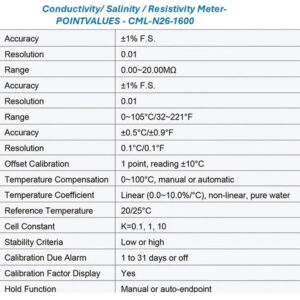
Desktop Conductivity/ Resistivity/ ...


Magnetic Coating Thickness Range &#...


Portable Density, Concentration and...
Reviews
There are no reviews yet.